Custom Collections
Custom Collections is a feature which allows you to save filter and search criteria for repetitive use. Custom Collections are built from base collections—e.g. All Work, My Work, and PM Work in the Work Requests workspace—to which you apply a set of filters.
 Create a Custom Collection
To create a custom collection:
-
Open any of the workspaces in the upgraded software—such as Work Requests, Transactions, Leases, etc.
-
Open a Base Collection—such as the All Work, My Work, or PM Work collections in the Work Requests workspace.
-
Click the Filter button
 in the toolbar on the right side of the Collections pane to open the Filter Panel.
 -
Fill in your desired fields in the Filter Panel.
There are three types of fields in the Filter Panel: type-ahead, drop-down, and date pickers.
-
Click the check mark button at the top-right of the Filter Panel.
The check mark should have a pulsing orange box around it. Your workspace refreshes and displays new results based upon the filters you have applied.
-
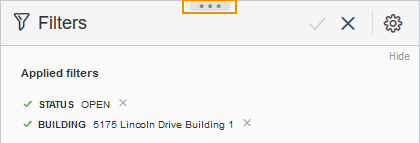
Open the Filter Panel.
Your applied filters display at the top of the panel.
-
Open the Filter Panel Drawer by clicking the button at the top of the Filter Panel.
 Note:
Note:The button to open the Filter Panel Drawer is at the top of the Filter Panel.
-
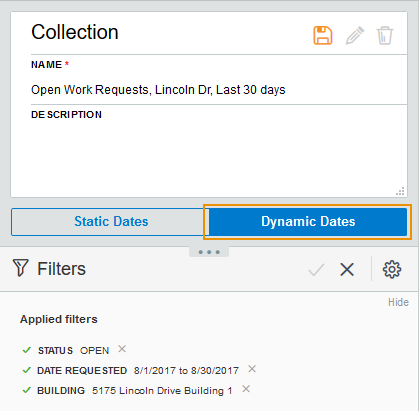
Name the collection and add an description.
-
Click the Save button.
Once the collection refreshes, the custom collection is added to the Collections field.
 Static vs. Dynamic Dates
Custom collections can be created using static dates—such as January 2nd-January 4th—or dynamic dates—such as "the last 2 days".
By default, your collection uses static dates.
To create a Custom Collection using dynamic dates:
-
Open any of the workspaces in the upgraded software—such as Work Requests, Transactions, Leases, etc.
-
Open a Base Collection—such as the All Work, My Work, or PM Work collections in the Work Requests workspace.
-
Click the Filter Button
 to open the Filter Panel.
 -
Fill in your desired fields in the Filter Panel.
-
Click the check mark button at the top-right of the Filter Panel.
The check mark should have a pulsing orange box around it. Your workspace refreshes and displays new results based upon the filters you have applied.
-
Open the Filter Panel.
-
Open the Filter Panel Drawer.
To learn how to open the Filter Panel Drawer, see Step 7 of the Create a Custom Collection procedures above.
-
Name your custom collection.
-
Click the Dynamic Dates button.
-
Click the Save button.
The filter automatically increments the dates it applies to by using the number of days in the date range you selected in Step 4.
One of the filters you choose must be a date range.

