Documents - Legacy User Interface
This topic describes how to manage documents in the legacy user interface.
 Open a File
To open a file:
-
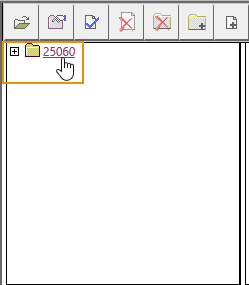
Click the parent folder to open it.

A section opens showing all files within the folder.
-
Select the check box next to the file you want to open.
-
Click the Open File button
 .
.A message appears, asking if you want to open or save the file. Choose your preferred option.
 Add Documents
To add documents:
-
Click the parent folder to open it.

A section opens showing all files within the folder.
-
Click the Add File(s) button
 .
.The Upload Files window opens.
-
Click the Browse button.
An Upload dialog box opens.
-
Find the document you want to upload.
-
Write a description of the document in the Description field.
-
Choose between two options:
-
If you want to upload multiple documents:
-
Click the
 button to save this document and upload another.
A new tab opens in the Upload Files window.
-
Repeat steps 3 - 6 until you have uploaded all the documents you want to upload.
-
Click the Save button.
-
-
If you only want to upload this document, click the Save button.
-
 Delete Documents
To delete documents:
-
Click the parent folder to open it.

A section opens showing all files within the folder.
-
Select the check box next to the file name of the file you want to delete.
-
Click the Delete File(s) button
 (or click the Cancel button to exit without deleting the file).
A dialog box opens, asking you to confirm your choice.
-
Click the OK button.
The file is deleted.
 Check Out / Check In Documents
Steps 3 - 4 pertain to checking out a file, and steps 5 - 8 pertain to checking a file in.
To check documents in and out:
-
Click the parent folder to open it.

A section opens showing all files within the folder.
-
Navigate to the file you want to check out.
-
Select the check box next to the file you want to check out.
-
Click the Check In / Check Out button
 .
.A message appears, asking if you want to open or save the file. Choose your preferred option.
-
Once you are done making changes to the file, select the check box next to the file again.
-
Click the Check In / Check Out button
 .
.The File Check In window opens.
-
Choose between three options:
-
Check in the file:
-
Give the version of the file a unique identifier in the Name field.
-
Click the Browse button.
-
Select the file you want to upload.
-
Click the Open button.
-
Enter a description of the changes in the Description field.
-
Proceed to step 8.
-
-
Undo check out: Self-explanatory.
-
Rollback: This option allows you to choose a previous version of the file to revert to. Select the version of the file you want to use from the Choose Version field
-
-
Click the Save button.
The File Check In window closes. Your changes are saved.
 Add Folders
To add folders:
-
Click the parent folder to open it.

A section opens showing all files within the folder.
-
Click the New Folder button .
The Add Folder window opens.
-
Enter a name for your new folder in the Name field.
-
Click the Save button.

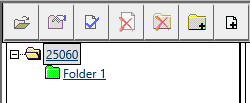
The new folder appears in your documents navigation pane.
-
Click the folder to open it.
-
To upload files to this folder, follow the steps in the Add Documents procedures.
 Delete Folders
To delete folders:
-
Click the parent folder to open it.

A section opens showing all files within the folder.
-
Click the folder you want to delete.
The folder opens.
-
Click the Delete Folder button
 .
.A dialog box opens, asking you to confirm your choice.
-
Click the OK button.
The folder is deleted.
A window showing the estimated time for deleting the files may appear.
 Rename a Folder
You cannot change the name of the parent folder.
To rename a folder:
-
Click the parent folder to open it.

A section opens showing all files within the folder.
-
Click on the folder you want to rename.
The folder opens.
-
Click the Folder Properties button
 .
.The folder properties window opens.
-
Make your changes.
-
Click the Save button.
The folder name is saved.
It may take a few moments for the folder name to update. If it does not update after a few moments, navigate away from the page and then return.
