My Home - Legacy
The My Home page allows you to see your notifications, approvals, and work requests at a glance. It is highly customizable, allowing you to create custom pages that you can use to track other data in your portfolio. The My Home page has three tabs that are used to access its different parts: View System Page, View My Home Page, and Edit My Home Page.
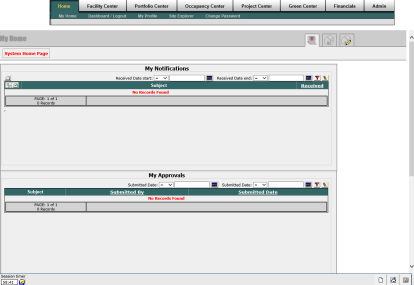
The Legacy My Home page.
 System Page
The System Page is the default page that you are directed to when you open Legacy BIGCenter. This page is split into three sections: My Notifications, My Approvals, and My Work. The System Page can be accessed at any time by clicking the View System Page button.

Open the expanding sections below to learn more about each section. The links in each of these sections will take you to the relevant legacy page, even if you are accessing these pages from within the upgraded software.
 Filter Using a Date Range
-
Find the tools in the upper-right corner of the section you want to filter.
-
Select a value from the field next to the Start Date (options include =, < (less than), <= (less than or equal to), > (greater than), and >= (greater than or equal to)).
-
Click the Calendar button
 and use the Date Picker to select the date you want to sort by.
 -
Repeat steps 2 - 3 for the End Date fields.
-
Click the Filter button
 .
.The items in the section are filtered. To remove the filter, click the Clear Filter button
 .
.
 My Notifications
The My Notifications section displays all notifications which have been sent to you. For example, if you were added to a budget, but were marked as "Notify Only", that notification would appear in this section. Here are the actions you can take in the My Notifications section:
-
Click the link in the notification to view the item you are being notified about.

Click the link in the notification message.
-
Click the View Read Notifications button
 to view the notifications which have been marked as read.
 -
Click the Select All button
 to select all notifications currently in the My Notifications section.
 -
Click the Mark selected notification(s) as read button
 to mark the notifications you selected as read.
 My Approvals
The My Approvals section displays all requests for approval which have been sent to you.
If there are multiple approvers, any reject or revise action by one approver will halt the entire approval process.
To approve an approval request from the My Approvals section:
-
Click the link in the approval request to view the request.
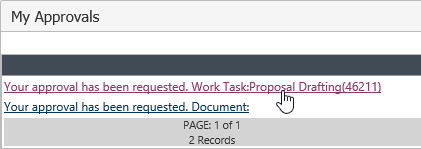
Approval request link.
You are then taken to the page necessary to respond to the request.
-
Click the Action Taken button
 to take action on the request .
The Approvals page opens.
-
Choose between four options:
-
Click the Approve button
 to approve the request.
The request is approved.
-
Click the Reject button
 to reject the request.
The request is rejected.
-
Click the Revise button
 to request a revision of the request.Important!
A comment is required for the Revise action.
The request is sent back to the submitter with comments. The submitter must meet the requirements of the approver before resubmitting for approval.
-
Click the Skip button
 to skip taking action on the request.
If you are the only final approver or if the other final approvers have all been skipped, the Skip action will not be available. At least one final approver must take action (approve/reject/revise) for every approval.
-
 My Work
To view a work request which has been assigned to you:
-
Click the link in either the Work Request column or the Subject column.
Click either of the links indicated in orange in the screen shot above.
The Work Request Detail page opens.
-
To take action on a work request, follow the instructions sets on the Work - Facility Center page.
 Create or View Your Custom Home Page
You can create custom tiles to have quick and easy access to data across the system. These tiles are viewed on your My Home page.
To view and create a custom My Home page:
-
Click the View My Home Page button in the My Home toolbar.

View My Home Page button.
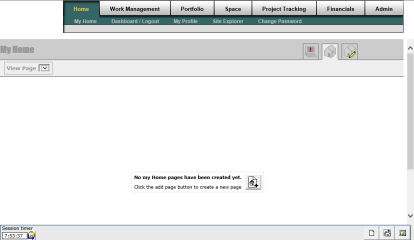
The Home Page opens. If you have not created a home page, the page looks like the screen shot below:
Home page if you have not created a home page.
-
Click the Add Page button.

The Add Page button.
The Create a New Page opens.
-
Enter a title for your page in the Page Title field.
-
Click the Next button
 .
.The Step 1 page opens.
-
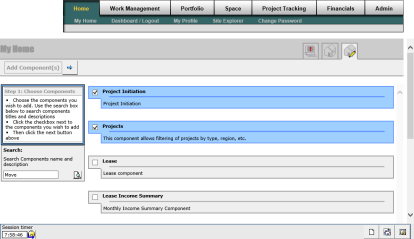
Select the check boxes next to the components you want to add to your home page (examples include Leases, Projects, and Invoices, among others).
The components will turn blue once selected.
In this screen shot, the Project Initiation and Projects components are selected.
-
Click the Next button
 once you have selected the components you want to add to your home page.
The Step 2 page opens.
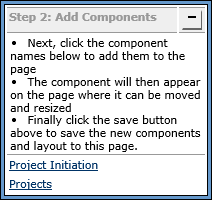
Step 2 page instructions tile.
-
Click a component name link in the Step 2 instructions tile.
The component opens in a tile.
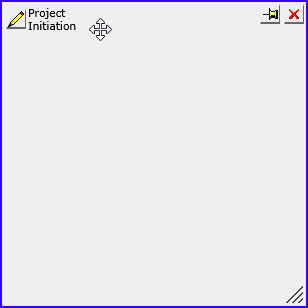
Component tile.
Important!Perform steps 8 - 10 in the order given below. If you drag and drop your tile before resizing it, you will not be allowed to resize the tile again.
-
Drag the bottom-right corner of the tile into the size and shape you want the tile to be.

Click and drag the bottom right corner to resize the tile.
-
Click and drag the component tile to where you want it on your home page.
-
Click one or more of the following buttons on the component tile:
-
 - Edit Component Title button - click this button to edit the title of the component tile.
 -
 - Pin Component Here button - click this button to pin the component tile in the place where you dragged it.
 -
 - Cancel Component Edit button - click this button to cancel all edits you have made to the component tile.
-
-
Repeat steps 7 - 11 until all component tiles have been added to your My Home page.
-
Click the Save button.
The page is saved. The component tiles you added appear when you click the View My Home Page button in the My Home toolbar.
Note:You can create several pages which will appear in a field on your View My Home Page. To learn how, see the Edit Your Home Page procedures below.
 Edit Your Home Page
To edit a custom My Home page:
-
Click the Edit My Home Page button in the My Home toolbar.
The Edit Page opens.

Edit My Home Page button.
-
Select the page you want to edit from the Edit Page field.
The page you selected from the field opens.
Edit Page field.
-
Expand the sections below to find the instructions set which applies to your needs:
 Edit a Page Name
To edit the name of a page:
-
Ensure that you have followed step 2 of the Edit Your Home Page procedures, and that you are on the page whose name you want to edit.
-
Click the Edit Page Title button
 next to the Edit Page field.
The title of the page becomes editable.
-
Enter the new page title in the field.
-
Click the Save button.
The page title is saved.
 Make Changes to Existing Content on a Page
To make changes to existing content on a page:
-
Ensure that you have followed step 2 of the Edit Your Home Page procedures, and that you are on the page whose component tile you want to edit.
-
Click the component tile you want to edit.
-
Follow steps 8 and 9 of the Create or View Your Custom Home Page procedures to make changes to your component tiles.
Note:If you need to resize a tile, click on the tile once and then drag the bottom-right corner of the tile into the desired shape and size. Then drag and drop the tile into the location you want.
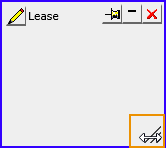
Lease tile being resized.
-
Click the Save button.
The page is saved.
 Add a Component to a Page
To add a component to a page:
-
Ensure that you have followed step 2 of the Edit Your Home Page procedures, and that you are on the page to which you want to add a component.
-
Click the Add Component(s) button.
The Add Component button.
-
Follow steps 7 - 13 of the Create or View Your Custom Home Page procedures.
 Create a New Page
To create a new page:
-
Click the Add Page button.
The Add Page button.
-
Follow the Create or View Your Custom Home Page procedures.
 Delete a Page
To delete a page:
-
Ensure that you have followed step 2 of the Edit Your Home Page procedures, and that you are on the page to which you want to add a component.
-
Click the Delete Page button.
The Delete Page button.
A dialog box opens, asking you to confirm your choice.
-
Click the OK button.
The page is deleted. It no longer appears in the View Page or Edit Page fields.
-
-
To return to the System Home Page, click the View System Page button.

View System Page button.
The System Home Page opens.
