Maintenance Management - Facility Center
Users can manage their preventative maintenance, equipment, job plans, and service providers using the Maintenance Management page. To learn how to view and complete preventative maintenance, see the Preventative Maintenance page.
 Create Equipment
To create a new piece of equipment:
-
Open the Legacy Menu.
-
Select Facility Center > Maintenance Mgmt > Equipment.
-
Use the search filters to search for a property.
-
Click the Search button.
The Equipment List page opens.
-
Click the Add Equipment button .
The Add Equipment page opens.
-
Enter the equipment information.
Note:Field names that are red are required.
-
Click the Save button.
Your equipment is now entered in the system. An equipment code is auto-assigned and shown on the following screen.
 Edit Equipment
To edit a piece of equipment:
-
Open the Legacy Menu.
-
Select Facility Center > Maintenance Mgmt > Equipment.
-
Use the search filters narrow your results.
-
Click the Search button.
The Equipment List page opens.
-
Find the equipment you want to edit.
-
Click the link in the Equipment ID column of the equipment you want to edit.
The Update Equipment page opens.
-
Make your changes.
-
Click the Save button.
The page refreshes. Your changes are saved.
 Create Job Plan
-
Open the Legacy Menu.
-
Select Facility Center > Maintenance Mgmt > Job Plans.
-
Use the search filters to search for a piece of equipment.
The View Job Plans page opens.
-
Click the Add Job Plans button
 .
.The Add Job Plans page opens.
Note:Field names that are red are required.
Note:Facility Center automatically creates a Job Plan ID for your new job plan.
-
Enter the high-level job plan information.
-
Job Plan Type — Choose between Equipment (such as an HVAC unit) or Locational (such as a Fire Extinguisher)
-
Job Plan Indicator — Typical Indicators include:
-
A — annual
-
M — monthly
-
W — weekly
-
-
Priority
-
Description
-
Equipment Standard — Choose the type of equipment
-
Skill — the type of service provider required
-
Skill Level — the sub-type of service provider required
-
Disruption — whether this job plan will interrupt the day-to-day activities of individuals who use the equipment
-
Shift — when this maintenance can be performed
-
Frequency
-
-
Select the corresponding check boxes if the following apply:
-
Mandatory — this job plan is mandatory
-
Certification — certification is necessary to complete this job plan
-
Critical — this preventative maintenance is critical
-
-
Choose between the two option buttons:
-
Master — this job plan affects all equipment of this type
-
Site Specific — this job plan only affects the equipment of this type at a specific location
-
-
Click the Save button.
The Update Job Plan page opens.
-
Click the Add Job Plan Step button
 .
. -
Enter the first step of the job plan.
-
Click the Save button.
-
Repeat steps 10-11 until all job plan steps are entered.
-
Click the X button after the last job plan step has been saved.
-
Enter a safety plan in the Safety Plan field.
-
Select a trade from the Trade field — such as electrician, plumber, etc.
-
Select a trade from the Skill field.
-
Enter the estimated hours required for this job plan.
-
Enter any materials required for this job plan in the Materials field.
-
Enter any tools required for this job plan in the Tools field.
-
Click the Update button.
Your job plan is now complete. You can now navigate away from the Update Job Plan page. Your changes are saved.
 Edit a Job Plan
Editing a job plan changes all instances of the job plan. If you only want to change one instance of a job plan, make the change when you schedule preventative maintenance.
To edit a job plan:
-
Open the Legacy Menu.
-
Select Facility Center > Maintenance Mgmt > Job Plans.
-
Use the search filters to search for a piece of equipment or a job plan.
The View Job Plans page opens.
-
Click the Update Job Plan link for the job plan you would like to edit.
-
Make the changes you would like to make to your job plan.
-
Click the Update button.
Your job plan is now updated. You can now navigate away from the Update Job Plan page. Your changes are saved.
 Schedule Preventative Maintenance
Only users who are facilities managers or system administrators can schedule preventative maintenance.
To schedule preventative maintenance:
-
Open the Legacy Menu.
-
Select Facility Center > Maintenance Mgmt > Schedule.
-
Use the search filters to narrow your results.
-
Select PMs from the toolbar at the top of the workspace.
-
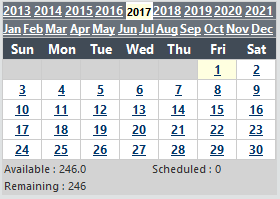
Select the month and year in the calendar.

Preventative maintenance calendar.
-
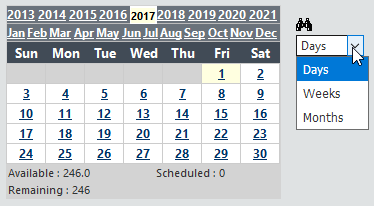
Choose whether you want to see maintenance required in the next day, week, or month by selecting the appropriate option from the field next to the calendar.

field next to preventative maintenance calendar.
-
Select the check box next to the preventative maintenance you want to assign.
Note:You can assign multiple preventative maintenance work requests at the same time.
-
Click the Assign button
 .
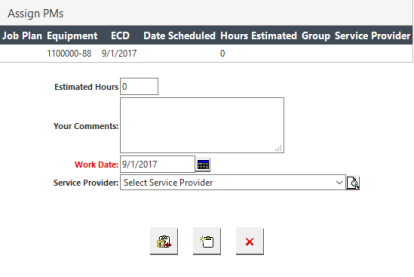
.The Assign PMs window opens.
Assign PMs window.
-
Enter the estimated hours, work date, and any comments.
-
Click the Search button next to the Service Provider field.
-
Enter the service provider's name.
-
Click the Search button at the bottom of the dialog box.
-
Select the service provider from the Service Provider field.
-
Click the Create Work Request button
 .
. -
Select the check mark in the Export to PDF column to export the work request to PDF.
-
Click the X button to close the window.
Once you close the Assign PMs window, the preventative maintenance request moves to the Assigned tab.
If you have the Work Requests workspace, this request now appears in the My PM Work collection for the chosen service provider.
 Edit a Preventative Maintenance Service Provider
If you need to change the service provider assigned to recurring preventative maintenance, you must edit the job plan. These instructions only change the service provider assigned to this particular work request.
To edit the service provider assigned to a single instance preventative maintenance:
-
Open the Legacy Menu.
-
Select Facility Center > Maintenance Mgmt > Schedule.
-
Use the search filters to narrow your results.
-
Select PMs from the toolbar at the top of the workspace.
-
Select the month and year in the calendar.

Preventative maintenance calendar.
-
Choose whether you want to see maintenance required in the next day, week, or month by selecting the appropriate option from the field next to the calendar.

field next to preventative maintenance calendar.
-
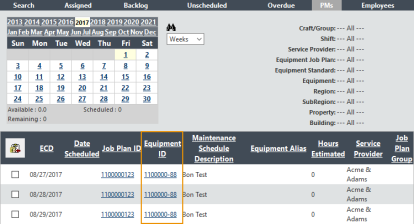
Click the Equipment ID in the preventative maintenance record you would like to change.
Equipment ID column.
The Update Equipment window appears.
-
Scroll down to the end of the Update Equipment section of the window.
-
Click the View Job Plan button
 .
.The equipment information page opens.
-
Click the Search button to the right of the Service Provider field.
-
Enter your new service provider's name.
-
Click the Search button at the bottom of the dialog box.
-
Select the service provider you want from the Service Provider field.
-
Select an update reason from the Update Reason field.
-
Click the Submit button to save your changes.
-
Close the window.
The service provider is now updated.


