Universal Attributes of Workspaces
The upgraded interface has several features which are universal to all workspaces. Expand each section to learn more about each feature.
 Collapsing Menus
Click the Menu button to collapse and re-open menus. This allows you to see your workspace in greater detail.

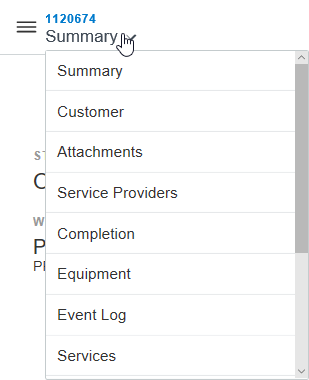
If you toggle a Menu Icon on a detail section menu, the detail sections become available in a field. Click the Detail Section title to open the Detail Section field.
 Collections
You can choose which records you see in your workspace by selecting from different collections.
To view a collection:
-
Click the Collections field in the upper-left corner of the workspace.

-
Select the collection you want to view.
The workspace refreshes, and you see filtered results based upon the collection you chose to view.
You can also create custom collections to sort for specific content. Click here to learn more about custom collections.
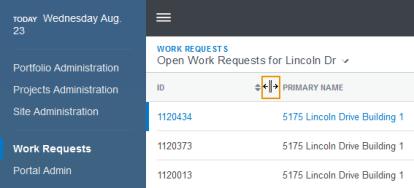
 Column Sizing
 Content Views
Workspace data can be viewed in three different ways: List View, Summary View, and Map View.
Click the content view buttons in the toolbar in the right side of the workspace to toggle which content view you want to use.
|
Name |
Icon |
Description |
|---|---|---|
|
List View |
|
A 3-way toggle showcasing results listing, record details listing, and dual-view of both results listing and record details listing. |
|
Summary View |
|
A 2-way toggle showcasing the selected record and a brief synopsis of valuable details regarding a record. You can change the way records are sorted in Summary view. See the Summary Collection View Sort procedures below. |
|
Map View |
|
A 3-way toggle that showcases a geographical representation of records on a map. Map View is only available in the Leases and Building Manager workspaces. |
 Customize What You See
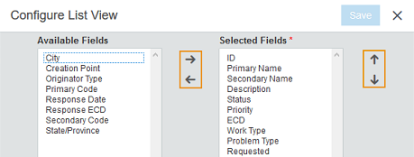
You can choose what columns or fields you want to see, whether in a list view, the Filter Panel, or another area of the upgraded interface. You can also choose what order you would like the columns or fields to be displayed in. Configuration is possible wherever the Configure button (![]() or
or ![]() ) can be seen.
) can be seen.
To configure columns or fields:
-
Click the Configure button:
 or
or  .
. -
Select the field you want to move between the Available Fields and the Selected Fields.
-
Click the left and right arrows to move the field.
-
To reorder the fields in the Selected Fields field:
-
Select the field you want to reorder from the Selected Fields field.
-
Click the up and down arrows to reorganize the fields.
-
-
Click Save.
Your changes are now reflected in the workspace.
You can also re-order columns by dragging and dropping columns in your workspace.
 Data Sorting
 Detail Section Menu
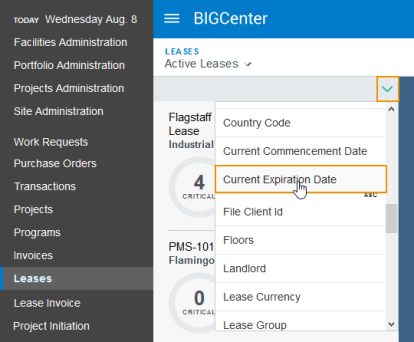
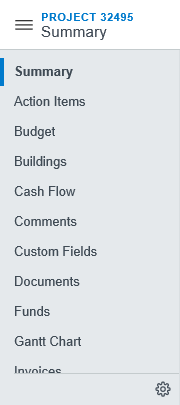
The Detail Section menu can be seen when you select a record in a workspace. The menu appears on the left side of the Details pane.
Click the Configure Button at the bottom-right of the detail sections menu to choose which detail sections appear in the menu. See the Customize What You See procedures above to learn more.
-
When you toggle the Menu button on a detail section menu, the detail sections become available in a field. Select the detail section title to open the Detail Section menu.
-
Select different detail sections to view and take action on different aspects of your work.
The options available in the Detail Section menu differ depending upon which workspace you are viewing.
 Export Collections
Every workspace has an action that allows you to export all the records in the currently selected collection to a .csv file.
To export collection records to a .csv file:
-
Open the workspace whose collection records you want to export.
-
Choose between two options:
-
Select a collection you want to export from the Collections field.
-
Use the Filter Panel to narrow the results you want to export from the Collections pane.
-
-
Click the Export button
 .
.You see a message asking if you want to open or save the .csv file generated by the system. Choose your preferred option.
The .csv file will contain all the records listed in the collection view when you clicked the Export button
 .
.
 Filter Panel
The Filter Panel can be accessed by clicking the Filter button on the right corner of the toolbar. To learn more about the Filter Panel, click here.

 Pagination
Pagination allows you to quickly jump to a specific page in a list of records. Pagination is not available in Map View.

 Previous and Next
Select the Previous and Next buttons to quickly jump between items while still viewing the same detail section.

 Save & New
Save & New, Save & Similar, and Save & Next are not available in all detail sections.
To quickly add multiple items to a record without closing the window:
-
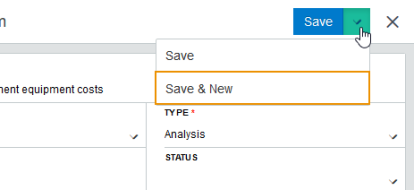
Click the small down arrow to the right of the Save button.
-
Click Save & New.
Clicking this item in the field saves the current item and then clears it from view. You can then create a new item without having to exit and re-enter the window.
-
Repeat Steps 1 and 2 until you finish entering all of your items.
-
To finish adding items to your record, you can either:
-
Click Save after you enter your last item.
-
Click Save & New after you enter your last item. Then, click the Close button
 in the upper-right corner of the window.Note:
Occasionally, you may see Save & Similar as an option in the Save & New field. This button saves the item you are working on, but keep some of its details so you can make another similar line item.
Additionally, when you edit an item, you may see a drop-down arrow next to the Save button. When you open the field, you see the option Save & Next. The Save & Next button saves the item you are editing, and moves to the next item in the detail section.
-
This opens a field, where the option Save & New is available.
 Summary Collection View Sort
To sort records in Summary view:
-
Open the workspace you want to sort.
-
If you are not using the Summary collection view, click the Summary button
 in the toolbar on the right side of the Collections pane.
The collection view changes to Summary view. A new pane with summary tiles appears below the Collections field.
-
Click the drop-down arrow in the header below the Collections field.
A menu opens.
-
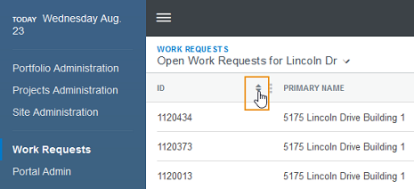
Select the field by whose value you want to sort the collection from the field.
The number of times you click the field determines how the pane is sorted.
-
Clicking the field once sorts the collection in ascending order.
-
Clicking the field twice sorts the collection in descending order.
-
Clicking the field a third time returns the collection to the default sort order.
-
